No products in the basket.
How to Mount Countersunk Magnets Properly
A countersunk magnet only works as well as the way it is fixed. If the screw sits proud, the magnet can rock. If the hole is too tight, the magnet can crack. And if the mounting face is uneven, you lose contact where the pull matters most. That is why knowing how to mount countersunk magnets properly makes such a difference in cabinet doors, workshop fittings, retail displays and custom fabrications.
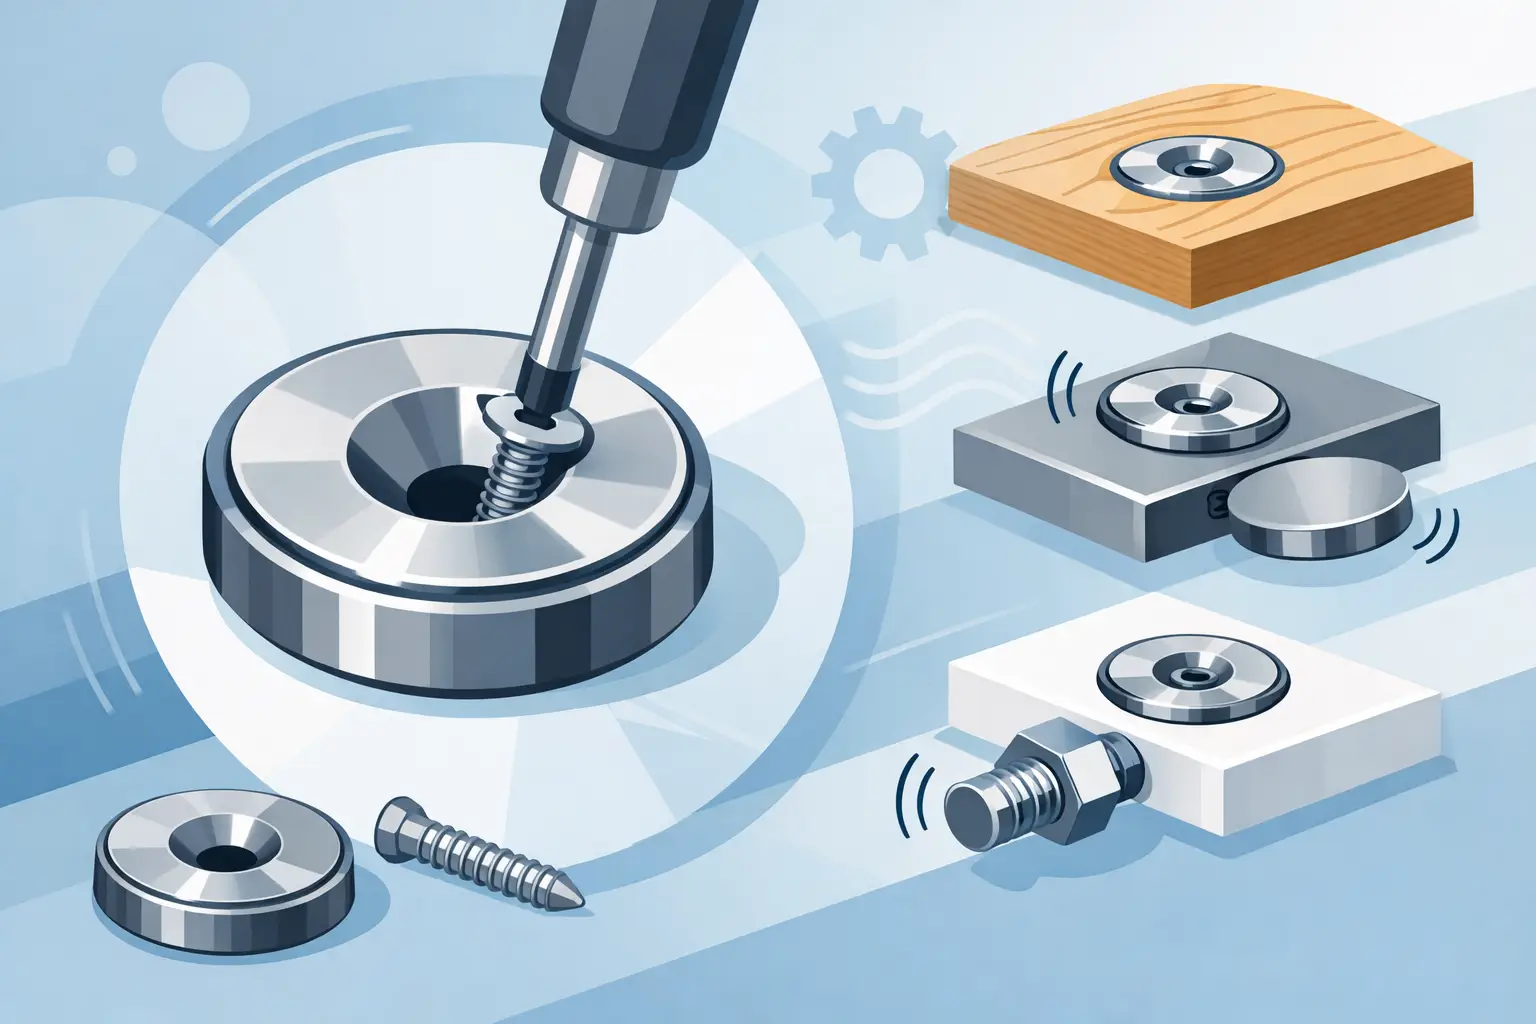
Countersunk magnets are designed to be screwed into place, giving you a clean and reliable fixing point without glue squeeze-out or awkward brackets. The countersunk hole allows the screw head to sit flush inside the magnet, which helps keep the contact face clear. That simple detail is what makes them such a practical choice for doors, panels, catches and removable covers.
How to mount countersunk magnets without damaging them
The first job is choosing the right surface and the right fixing. Countersunk neodymium magnets are very strong for their size, but they are not indestructible. They are hard and brittle rather than flexible, so over-tightening a screw or forcing the magnet onto an uneven surface can chip or split it.
Start with a flat mounting area. If you are fixing into timber, make sure the face is smooth and not raised around the pilot hole. If you are fixing onto metal, remove burrs and check that the magnet can sit square. A countersunk magnet needs even support across its base. Any high spot underneath concentrates pressure and increases the risk of damage when the screw is tightened.
Use a screw that matches the countersunk hole correctly. Too large, and it can stress the magnet around the opening. Too small, and the magnet may not sit firmly in place. The screw head should fit neatly into the countersink so it finishes flush, not wedged and not rattling about. In most practical jobs, a standard countersunk screw is the right choice, but the exact size depends on the magnet and the substrate.
Before final fixing, drill a proper pilot hole. This matters especially in hardwood, MDF and laminated boards, where driving a screw directly can create too much pressure. The pilot hole should suit the screw, not the magnet. You want the screw to pull the magnet down securely, not fight the material all the way in.
Tighten the screw until the magnet is held firm, then stop. That point is usually earlier than people expect. You are securing a magnet, not clamping a steel bracket. If you keep going, the result is often a cracked ring around the countersunk hole.
Mounting countersunk magnets in wood
Wood is one of the most common materials for countersunk magnets because it appears in cabinets, workshop storage, furniture, access panels and point-of-sale units. It is also forgiving, provided you prepare it properly.
For surface mounting, mark the position carefully and drill a pilot hole deep enough for the screw. Then place the magnet on the surface and drive the screw in gently until the magnet is stable and flush. This is the fastest method and works well where the magnet can remain visible or where speed matters more than concealment.
If you want a neater finish, recess the magnet slightly into the timber. A shallow flat-bottomed recess lets the magnet sit level with the face, which can improve appearance and reduce snagging. The recess must be accurate. Too shallow, and the magnet sits proud. Too deep, and you lose contact with the opposing plate or magnet, which reduces holding performance.
MDF and chipboard need a bit more care than solid timber. They can crumble around fixings if the pilot hole is poor or the screw is too aggressive. In these materials, a precise pilot hole and light tightening are especially important. If the fixing feels weak, it is usually better to rethink the screw size or position than to simply tighten harder.
How to mount countersunk magnets on metal and other hard surfaces
Mounting onto steel can give excellent pull performance because the magnet has a strong contact surface, but the fixing method changes. If the steel surface is thin, you may be able to use a machine screw with a nut on the reverse. If it is thicker, a tapped hole may be the cleanest option. Either way, the same rule applies: the magnet should sit flat, and the screw should secure it without forcing it.
On painted or coated metal, check that the finish is sound. Loose coating under the magnet can reduce stability over time. If the installation is exposed to vibration, such as on workshop equipment or moving panels, it is worth checking the fixing after initial use.
For plastics and composites, success depends on rigidity. Some harder plastics hold a countersunk screw well. Others can deform under pressure, which leaves the magnet uneven. When that happens, pull performance becomes less predictable. In lighter-duty applications, that may be acceptable. In a cabinet catch or repeated-use closure, it usually is not.
Getting the magnetic face and polarity right
A secure fixing is only half the job. The magnet still needs to meet the opposing surface properly. If you are mounting a countersunk magnet to pull against a steel plate, make sure the contact area is aligned and large enough. A tiny strike plate against a larger magnet can work, but full contact usually gives better results.
If you are using two magnets facing each other, polarity matters. Offer them up before fixing the second one. It sounds obvious, but it is an easy mistake to make during a multi-part install. Fix one magnet, test the mating piece, then mark the correct orientation before drilling the next hole.
Keep in mind that a countersunk hole slightly reduces the magnetic material in the centre. That is normal, and it is part of the design. The benefit is secure screw fixing. The trade-off is that pull performance depends even more on good face contact and correct alignment.
Common mistakes that weaken the result
Most fitting problems come down to installation rather than magnet strength. A powerful magnet will not make up for a poor mounting surface, the wrong screw, or a gap between faces.
One common mistake is over-tightening. Another is mounting onto uneven timber, where the magnet twists very slightly under load. People also lose performance by recessing the magnet too deeply or leaving a layer of material between the magnet and the contact point that they had not accounted for.
Using the wrong mate surface can also cause disappointment. If a cabinet door needs a crisp, dependable close, a proper steel strike plate or a well-matched opposing magnet usually performs better than a random screw head or small offcut of metal. Strong magnets are versatile, but they still respond to the basics of contact area and alignment.
There is also the issue of impact. Letting two neodymium magnets snap together during fitting can chip the coating or the magnet itself. Handle them with control, especially smaller countersunk types that can accelerate quickly in the hand.
Choosing the right countersunk magnet for the job
Not every countersunk magnet suits every installation. Size, thickness and pull strength all affect the result. A small magnet may be enough for a lightweight panel or display cover, while a heavier cabinet door or workshop hatch may need something larger or a pair of magnets spaced apart.
Think about how the load is applied. If the magnet is mainly holding a door shut, direct pull strength is the main concern. If the panel can slide or be knocked sideways, shear force becomes part of the picture too. In those cases, the mounting method and the overall design matter just as much as raw magnet strength.
For trade and DIY buyers alike, the best approach is usually to choose a magnet with some margin rather than working at the absolute minimum. That gives you a more dependable feel in use and a bit of tolerance for minor gaps, paint thickness or wear over time. That is one reason specialist suppliers such as Magman focus on strong, practical formats rather than novelty options.
A well-mounted countersunk magnet should feel simple once installed. The door closes cleanly, the panel stays put, and the fixing disappears into the job. Take a little care with the surface, screw and alignment at the start, and the finished result will usually be stronger, tidier and more reliable for the long term.