No products in the basket.
How to Attach Magnets to Wood Properly
A magnet that slides out of place or snaps free under load is usually a fixing problem, not a magnet problem. If you are working out how to attach magnets to wood, the right method depends on three things – the magnet format, the timber surface, and how much force the finished job needs to handle.
For a light-duty catch on a cupboard door, a good adhesive may be enough. For a workshop jig, retail display, or heavier closure, you will often get a better result from a countersunk magnet fixed with screws. Wood is forgiving to work with, but it still moves with moisture and temperature, so the bond needs to cope with real use rather than just looking neat on the bench.
How to attach magnets to wood for a strong hold
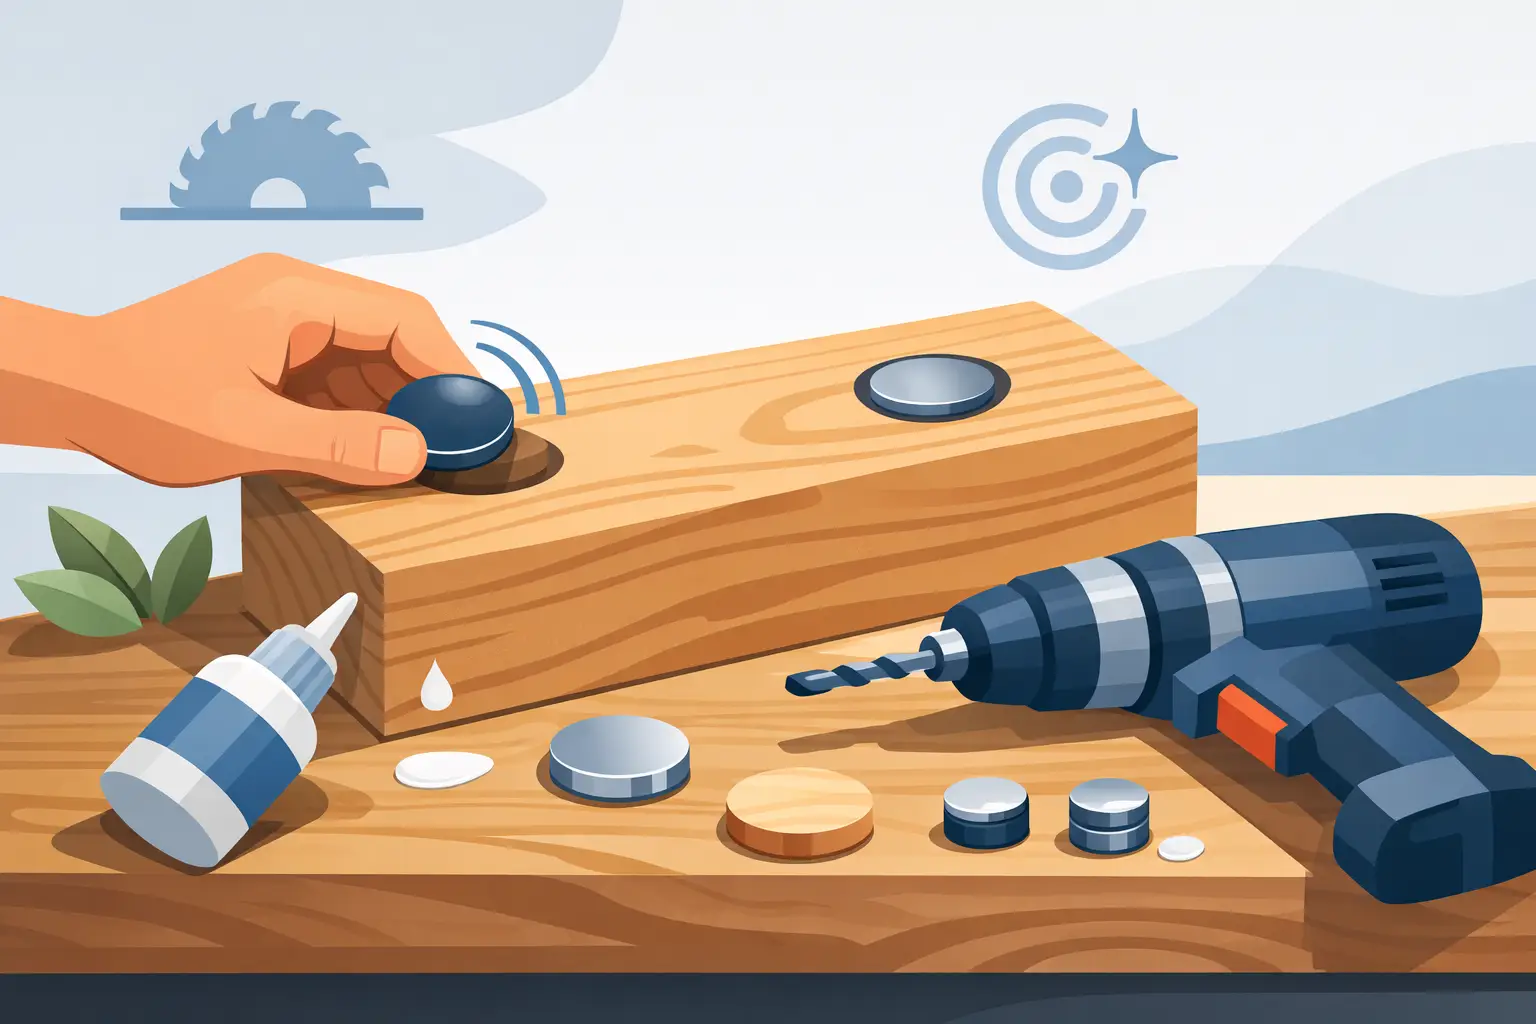
The first choice is whether to glue the magnet onto the surface, recess it into the wood, or mechanically fix it. Surface mounting is quickest, but it leaves the magnet exposed and gives adhesive the full job of resisting pull, shear and knocks. Recessing the magnet into a drilled hole or shallow pocket usually gives a cleaner finish and more support around the sides.
Mechanical fixing is often the most dependable option when the magnet has a countersunk hole. In that setup, the screw does the holding and the magnet does the work it is designed for – providing strong magnetic pull. That split of duties matters, especially on cabinet doors, access panels, shop fittings, and repeated-use closures.
If appearance matters, a recessed fit is usually best. If speed matters, adhesive bonding can work well. If strength and repeat use are the priority, countersunk magnets are hard to beat.
Start with the right magnet format
Not all magnets are equally suited to timber fixing. Disc magnets are useful when you want a compact fixing point or a magnet hidden in a drilled recess. Block magnets give more surface area and can suit catches, lids and alignment jobs. Countersunk magnets are designed for screw fixing, which makes them especially practical on wood where a reliable mechanical fixing is easy to achieve.
This is also where pull strength matters. Strong neodymium magnets can be very compact, which is ideal when space is tight, but a stronger magnet is not always better if the mating surface is light, thin or easy to misalign. On a small cabinet door, too much pull can make the door awkward to open or place stress on the fixings over time.
Best ways to fix magnets to timber
Using adhesive
Adhesive is the simplest route when you do not want visible screws or when the magnet has no fixing hole. A two-part epoxy is usually one of the better choices for attaching magnets to wood because it fills small gaps and bonds well to both materials. A high-quality construction adhesive can also work for some jobs, though it tends to suit larger contact areas better than tiny discs.
Super glue can hold in some light applications, but it is not always the best long-term answer. It can become brittle, and magnets often fail by being knocked sideways rather than pulled straight off. That side load can break a hard, thin glue line surprisingly easily.
To get the best result, the timber surface should be clean, dry and lightly abraded if it is very smooth or sealed. The magnet should also be clean and free from dust or oily residue. Apply only enough adhesive to create a full bond without excessive squeeze-out, because surplus adhesive can affect how flush the magnet sits.
For adhesive-only fixing, clamping pressure helps, but magnets can make this awkward. Masking tape, a temporary spacer, or a simple jig can keep the magnet in place while the adhesive cures. It is worth waiting for full cure time rather than testing it early and weakening the bond.
Recessing magnets into wood
A recessed magnet usually performs better than one simply glued on top. By drilling a shallow hole with a Forstner bit or similar clean-cutting bit, you can seat the magnet flush or slightly below the surface. This improves appearance and gives the magnet some protection from direct knocks.
A close-fitting recess also reduces reliance on adhesive alone. Instead of the bond resisting every force, the surrounding wood helps locate the magnet. That is useful for lids, catches, hidden closures and fitted furniture where a tidy finish matters.
Accuracy is the key point here. If the recess is too deep, magnetic performance drops because even a small extra gap reduces pull. If it is too loose, the magnet can twist or creep. On hardwoods, take your time and test the depth before committing across a full run.
Fixing countersunk magnets with screws
If the magnet is designed with a countersunk hole, screw fixing is often the most secure method. It is a practical choice for cabinetry, workshop fixtures and installations that will be opened, shut or handled regularly. In this setup, the magnet stays firmly located even when the joint sees repeated use.
Use a screw that matches the countersunk hole properly and do not overtighten it. Neodymium magnets are powerful but brittle. If you drive the screw too hard, you can crack the magnet or chip the plating. A pilot hole in the wood is a good idea, especially in hardwood or near edges.
A washer is not usually used with a countersunk magnet because it interferes with the seating of the screw head. Instead, focus on correct screw size and controlled tightening. Hand tightening often gives better feel than driving the screw aggressively with power tools.
Common mistakes when attaching magnets to wood
One of the most common problems is choosing the fixing method based only on convenience. A small glued disc might hold a lightweight panel for a while, but if the panel is pulled sideways every day, failure is only a matter of time. Think about the direction of force, not just the weight.
Another mistake is ignoring the timber finish. Varnished, waxed or painted wood can reduce adhesive grip. If you are bonding to a finished surface, light abrasion and proper cleaning can make a major difference. On some decorative finishes, it may be better to create a recess in bare wood before final finishing.
Polarity is another easy one to get wrong. If you are fitting pairs of magnets, check orientation before final fixing. More than a few otherwise good projects have stalled because one magnet was glued in facing the wrong way.
There is also the issue of impact. Magnets can attract strongly enough to snap together and chip if left uncontrolled during assembly. That matters when you are fitting small but super-strong magnets into lids, panels or doors with narrow tolerances.
Choosing the best method for your project
If you are making a small box, cupboard catch or hidden panel, a recessed disc magnet bonded with epoxy often gives a clean result with plenty of holding power. If you are building something that will be used heavily, moved regularly or exposed to vibration, a countersunk magnet fixed with screws is usually the safer choice.
For retail displays or workshop setups, block magnets can be useful where you want more contact area or a more directional layout. For finer joinery or flush cabinet work, compact disc magnets tend to be easier to hide neatly. The right answer is not just about strength – it is about fit, finish and repeat performance.
This is where specialist magnetic hardware makes a real difference. A purpose-made fixing magnet with reliable plating, accurate dimensions and superior pull performance is far easier to work with than a cheap, inconsistent alternative. That is especially true when tolerances are tight or the finished piece needs to feel solid in daily use.
A simple fitting approach that avoids trouble
Before fixing anything permanently, test the magnet position with tape or a temporary jig. Check alignment, pull, opening force and the way the mating part lands. Then mark the exact position, prepare the timber properly, and fit one side before bringing the matching part into place.
If the magnet will sit close to the surface, keep the air gap to a minimum. If the joint will be opened frequently, avoid relying on brittle adhesive alone. If the piece is decorative, recess the magnet neatly rather than trying to hide a poor surface bond.
A good magnetic fixing should feel effortless once installed. It should close cleanly, hold confidently and stay put. Get the method right at the start, and the magnet becomes one of the most dependable parts of the build rather than the bit you end up replacing later.